Reversible, unpadded ring sling: Method
1 | Method 2 | Method 3
 This
method is great for two fabrics of the same or very similar weight, like a double
layer of lightweight silk (dupioni or shantung) or handkerchief/lightweight linen.
It yields a fully reversible sling where the opposite color is not shown at the
ring end (as would be the case if the two fabrics are simply sewn together like
a pillowcase and turned).
This
method is great for two fabrics of the same or very similar weight, like a double
layer of lightweight silk (dupioni or shantung) or handkerchief/lightweight linen.
It yields a fully reversible sling where the opposite color is not shown at the
ring end (as would be the case if the two fabrics are simply sewn together like
a pillowcase and turned).
Please note: if you're making slings using this method
that you intend to sell, please include a link back to these instructions in
your sales page. I was pretty happy being the only overlapping-pleat sling maker
on the market, and would like a little credit if you're selling them! You can
use the graphic at the bottom of the page, or just a text link -- either is fine. These directions have taken me many, many hours to put together -- they are not
just some random freebie. All directions on the site are
copyright to Jan Andrea, for personal use only, and are not intended for
bulk resale.
Materials needed:
- Fabric:
- Desired length of sling, times two. See the size
chart for the slings I sell
for fur ther detail.
- See the Fabric FAQ for specific fabric recommendations
and online sources
- I use this for a double layer of lightweight silk or linen, but it will also
work for light cottons and the like.
- Rings:
- Sewing machine and thread to match/contrast with the fabric.
- Time: about 2 hours
Preparing your fabric:
If your fabric is wider than about 36", I would suggest cutting it down
to 36" or less. I make mine about 30" wide; wider slings do provide more
"coverage" for older babies and toddlers, especially when nursing, but can really
swallow up a small baby in a cradle hold.
Optional pocket:
You can do an inset pocket (put this in before sewing the layers together!)
or a patch pocket -- a patch pocket on the
tail of the reverse color is a nice touch. The later can be done before sewing the layers together, or after; if done afterwards, keep in mind that the stitching
will show on the reverse.
Video directions:
Here's a video for those who are more visually-oriented, but PLEASE read through the directions and cautions below before you actually sew -- the video omits some things (like fabric choices) for brevity, but they are still very important.
Sewing the fabrics together:
 Sew the two lengths of fabric together along each of the short sides.
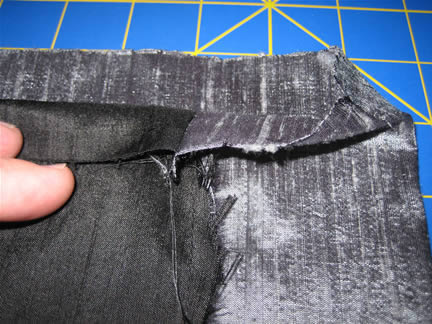
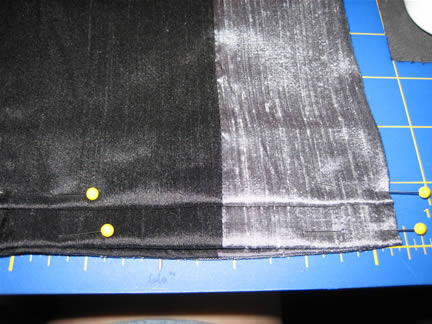
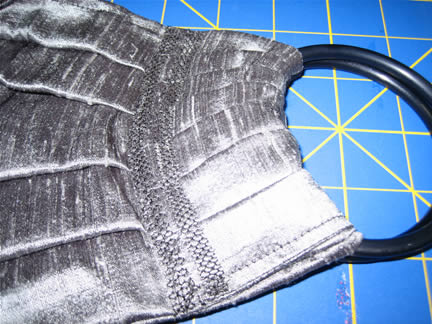
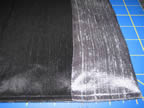
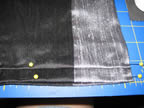
Offset the ends by about 3" (more, if you want to sew the rings in fur ther
than 3", if using a different shoulder style). Pin at the short-edge seams. This
offset is shown at right (click to enlarge).

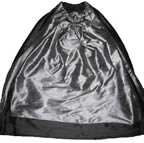
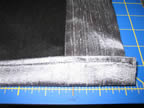
Shown at left is the opposite edge after the long edges are sewn (click to enlarge).
Leave a 4" space for turning somewhere along the long edge seams.

Turn the piece right side out through the space left for turning,
poking out the corners so they are square.
Topstitch the edges -- I use a 1/4"
foot for this
to make a consistent seam.
Pleats:
Keep in mind that you can use any shoulder style for this. If the style of
your choosing needs more than 3" of fabric to sew the rings in, leng then the
fabric and change the offset accordingly. This will work fine with "ga thered"
shoulders, too. I am giving fuller instructions for overlapping pleats because
that's what I do :)
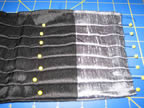
When
sewing in the pleats, one side of the sling (black, in these directions) will
be the "dominant" side with 7 pleats, and the other side (silver, in these directions)
will have 5 wider pleats. I generally consider the 7-pleat side to be the "right"
side, since it looks a little nicer than the 5-pleat side, but it will be fully
reversible.
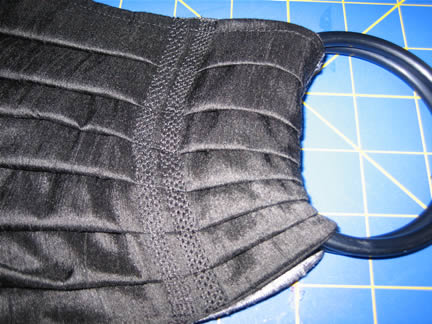
Place the fabric so that the dominant color shows for the majority of the
length, with the 3" section of the opposite color to the right (as shown in the
second picture above right).
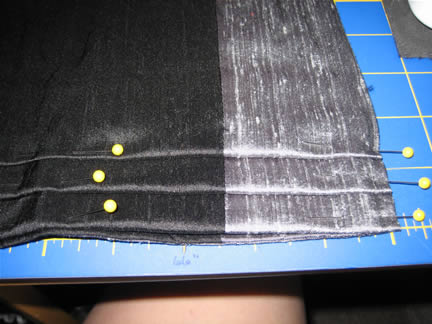
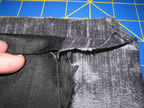
Fold the edge closest to you up by about 3/4". Finger press the fold (finger pressing
works really well on dupioni or shantung silk and linen).
Pinch the fabric so that you make another fold
where the edge meets the rest of the
shoulder fabric.
 Fold underneath and pin as shown at right.
Fold the edge up again,
so that 3/4" shows below the first pleat (as at left)
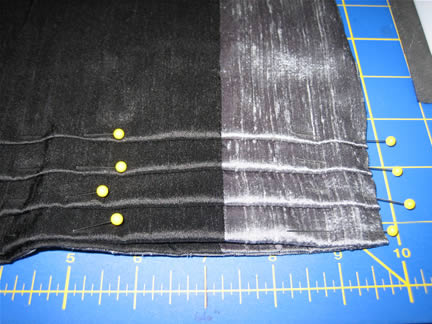
Pinch the fabric on the dominant side
so that you make another
fold
about 1/2" from the first.
Fold underneath and pin.
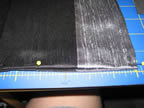
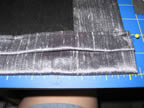
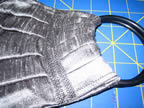
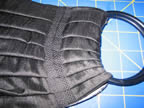
Repeat pleating process as above another 4 times. The last couple of pleats
on the dominant side are cosmetic -- you will be pleating on top of existing
pleats after the 5th 3/4" pleat. I know that sounds confusing; I'm not quite
sure how to describe it, though. It's like the last two pleats on the regular
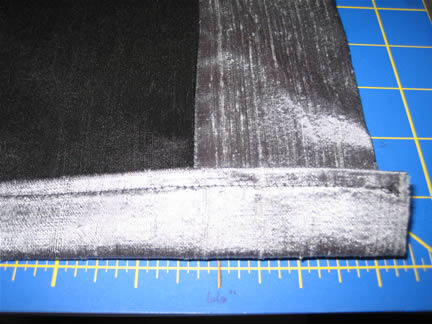
sling pleating page. The first three pictures
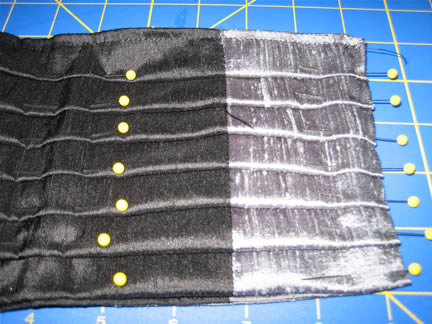
below show the pleating process; the last one shows the back of the sling with
its 5 pleats. If you look closely at the bottom edge in the last picture, you
can see that there are at least 3 layers of folds -- those are the cosmetic pleats.


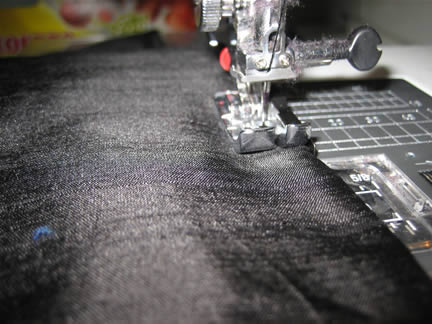
Sew the pleats in place with a basting stitch
(easier to take out later).
In this image I've sewn only the ones closest to the edge, but after I took the picture,
I also basted them in over the second
set of pins.
Putting in the rings:
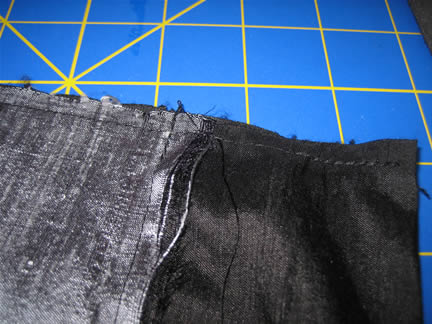
 After
you've made the pleats, just put the rings on as with a regular sling. Fold the
3" overlap over the rings towards its coordinating color. Sew the
rings in with at least two, but preferably three lines of stitching for strength.
I use a wide decorative stitch that I place right over the edge of the overlapping
fabric -- that hides the edge and makes it more truly reversible. The inside
is shown at left, and the dominant side on the right.
After
you've made the pleats, just put the rings on as with a regular sling. Fold the
3" overlap over the rings towards its coordinating color. Sew the
rings in with at least two, but preferably three lines of stitching for strength.
I use a wide decorative stitch that I place right over the edge of the overlapping
fabric -- that hides the edge and makes it more truly reversible. The inside
is shown at left, and the dominant side on the right.
the finished sling:
there is a 3" strip of the dominant color showing at the end of the "inside"
layer (which becomes the tail when threaded); if you prefer not to have this
strip, cut your inside layer about 3" longer than the dominant color. This strip
does not show when the sling is threaded the opposite way (so that, in this case,
black is inside and silver is outside). I find it a very appealing addition to the sling, myself, and do all my double-layer slings that way.
Threading your sling and babywearing:
I finally got around to adding illustrated
directions on threading and wearing your sling. Please check them out! If
you have any questions, please email
me!
All content, barring that which is otherwise attributed, is ©2023 to
Jan Andrea. If you wish to use my content on another page, please email before
doing so, even for content with the Creative Commons licenses. Text/images used
elsewhere must be attributed to me. Be advised that I will pursue copyright
violations.